Black and White Cookie Recipe


This easy homemade black and white cookie recipe is sure to be a hit with everyone who tries it and is perfect for any holiday or special gathering! Featuring a soft, cake-like texture and corn syrup-free icing, these simple yet impressive cookies are perfect for Christmas, New Year’s Eve, birthday parties, or just because!
As an Amazon Associate, I earn a small commission from qualifying purchases at no extra cost to you. This post may contain affiliate links. For more information see my full disclosure here.
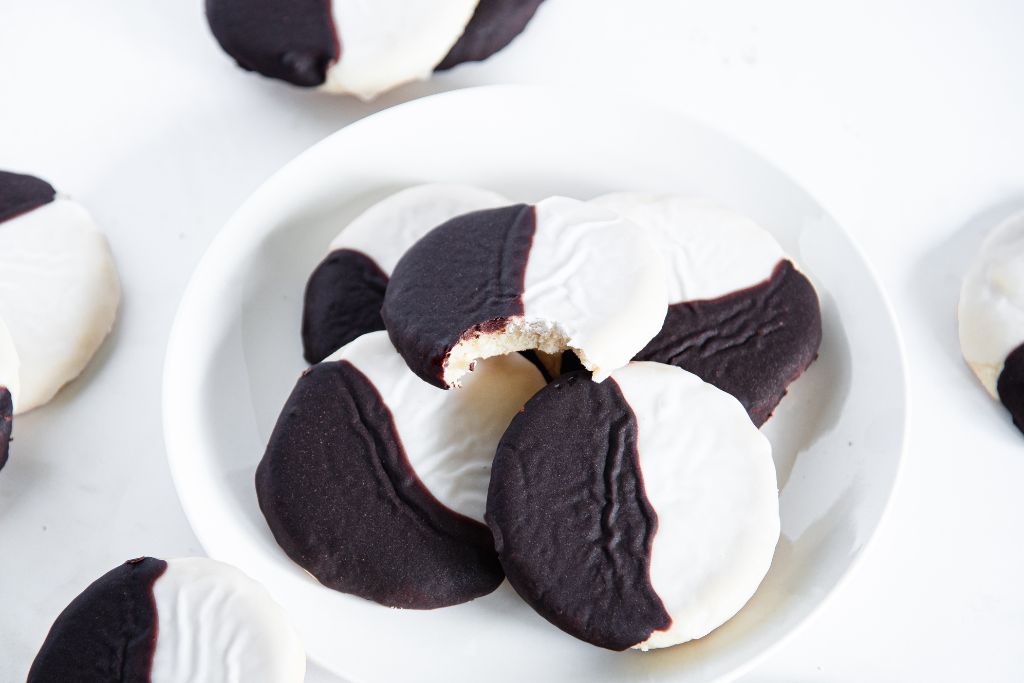
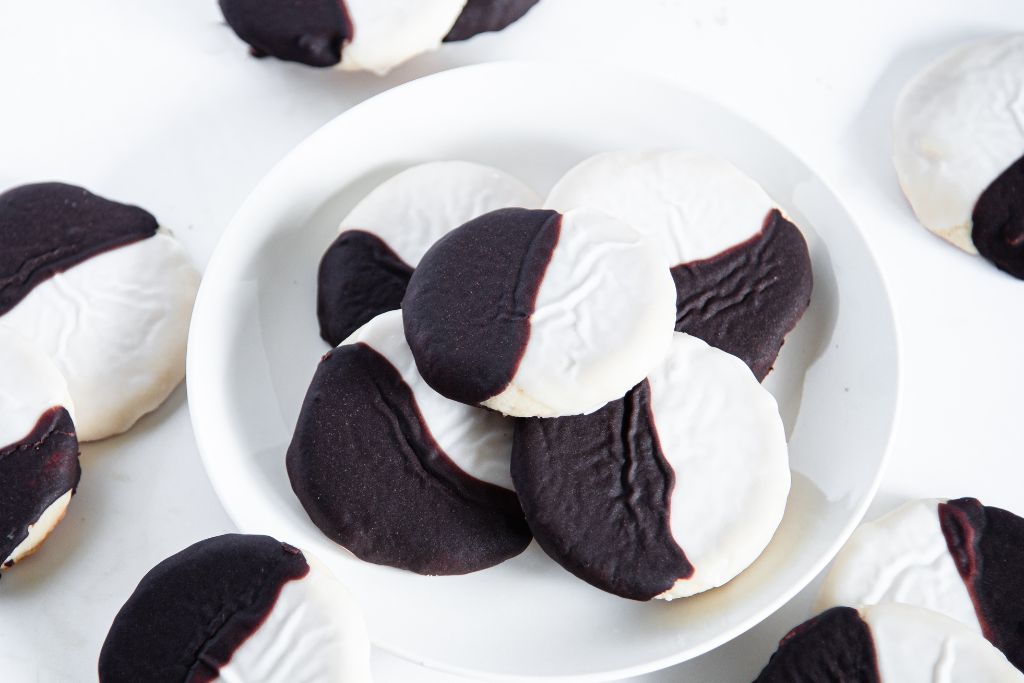
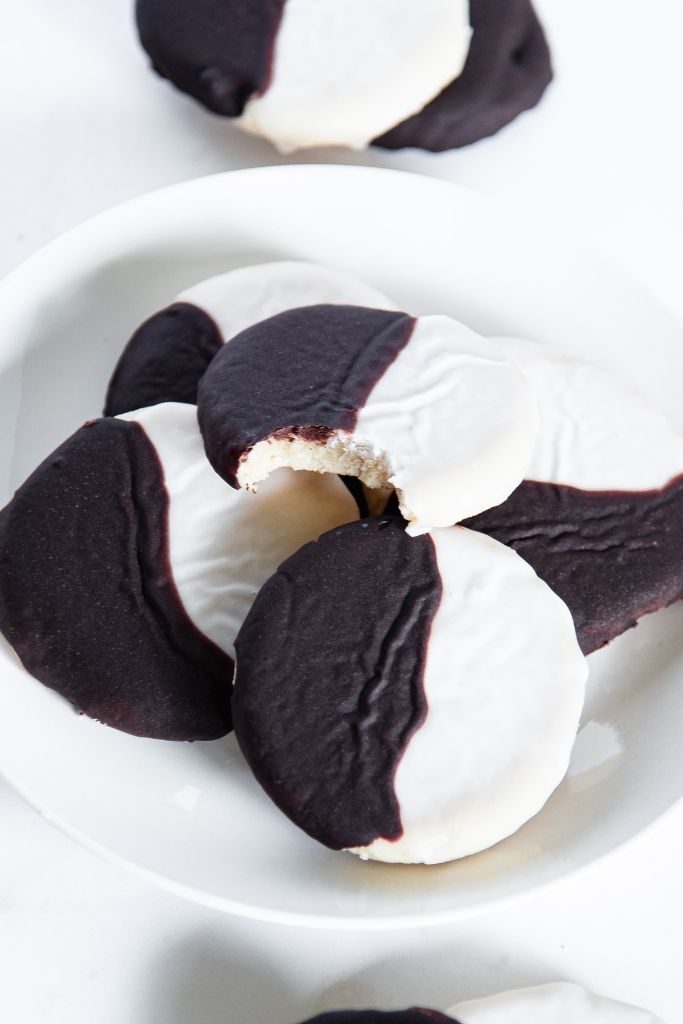
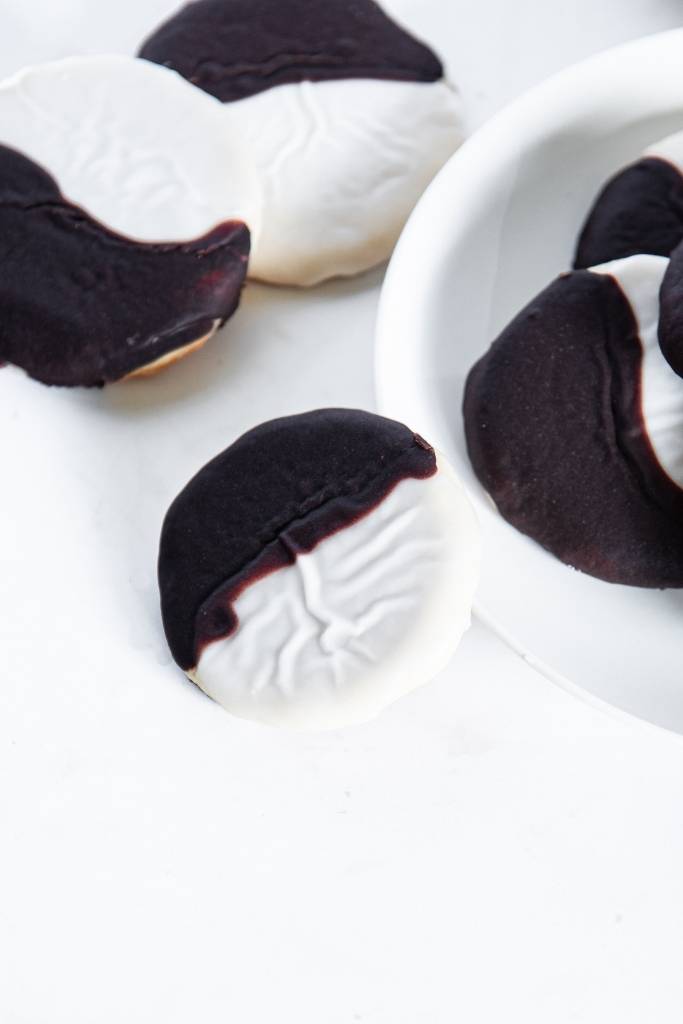
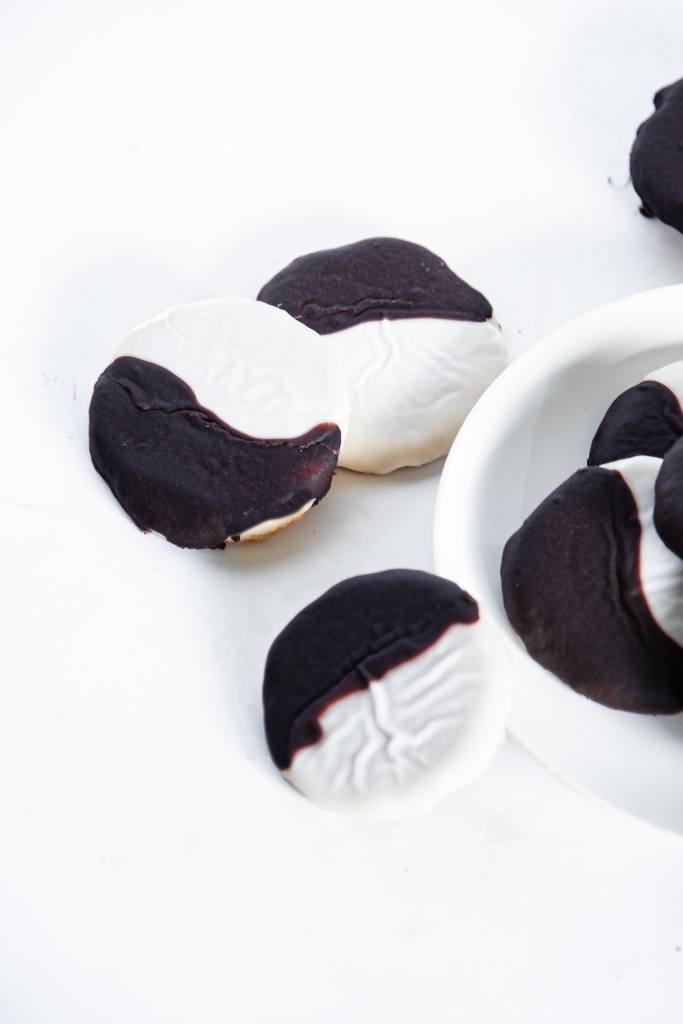
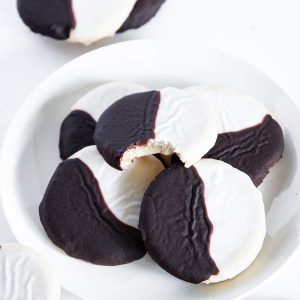
I think most of us are familiar with the classic New York-style black and white cookies, with their confectioners’ sugar-thin icing, ridged edges, and seemingly perfect white and black halves.
I don’t know what it is about these cookies—maybe it’s the fact that they have “New York” in their name, but despite seeming relatively simple to make, they always come across as indulgent, fancy, and impressive.
Even if they’re basically just soft sugar cookies with royal icing, these easy and delicious cookies have a way of stealing the show.
But before we get into the recipe, I think it’s only fair to say: I’ve never actually eaten a proper black and white cookie. And I’ve never been to New York City.
So, I won’t claim these are just as good as what you’d find at a bakery there. I can’t even guarantee that they’re anything like the traditional ones. But I can promise that these cookies are super yummy and a lot easier to make than you might think.
My family loved these cake-like cookies, with their soft centers and thin layer of icing. They didn’t take very long to make—and they disappeared even faster!
If you’re looking for the perfect cookie to serve for Christmas, New Year’s Eve, or your birthday, these simple and delicious black and white cookies are sure to be a hit!
Black and White Cookies Recipe
Ingredients
For the cookies:
- Unsalted butter, softened
- White sugar
- large egg
- Vanilla extract
- Sour cream
- All-purpose flour
- Baking powder
- Baking soda
For the white icing:
- Powdered sugar
- Whole milk
- Clear vanilla extract (optional)
Then, for the black icing (chocolate icing):
- Powdered sugar
- Whole milk
- Black cocoa powder (or Dutch-processed cocoa powder)
How to Make Black and White Cookies
Preheat the oven to 350°F. Line a large baking sheet with parchment paper and set aside.
In a large bowl, beat together the softened butter and white sugar until fluffy. Add the egg, sour cream, and vanilla extract, and beat until well combined.
Add the baking soda and baking powder, and mix. Finally, add the flour and beat until everything is fully incorporated. The dough will be very thick—don’t worry, that’s how it should be!
Scoop the dough using a tablespoon and roll into balls. Place them on your prepared baking sheet, leaving a decent amount of space between each one (I usually bake 5–6 cookies per sheet). Gently flatten each ball of dough with your hand.
Bake for 10–12 minutes, or until the bottoms and edges of the cookies are a light golden brown. Remove from the oven and gently flatten each cookie with the bottom of a glass or jar. (If your cookies already spread and flattened enough for your liking while baking, feel free to skip this step. I usually do it to make sure they’re all the same thickness.)
At this point, I always like to reshape my cookies using a wide-mouth canning jar ring to make them nice and round, but feel free to skip this step.
Allow the cookies to cool slightly on the baking sheet before transferring to a wire rack. Repeat with the remaining dough.
Once the cookies are completely cooled, make the icings.
For the White Icing
In a small bowl, combine powdered sugar and whole milk. Whisk until smooth. Add the clear vanilla extract, if using, and whisk again. Add more milk as needed to create a smooth, runny icing. Set aside.
For the Black Icing
In a separate bowl, combine powdered sugar and whole milk. Whisk until smooth. Add the cocoa powder and whisk to combine. Again, add more milk as needed to create a smooth, runny icing.
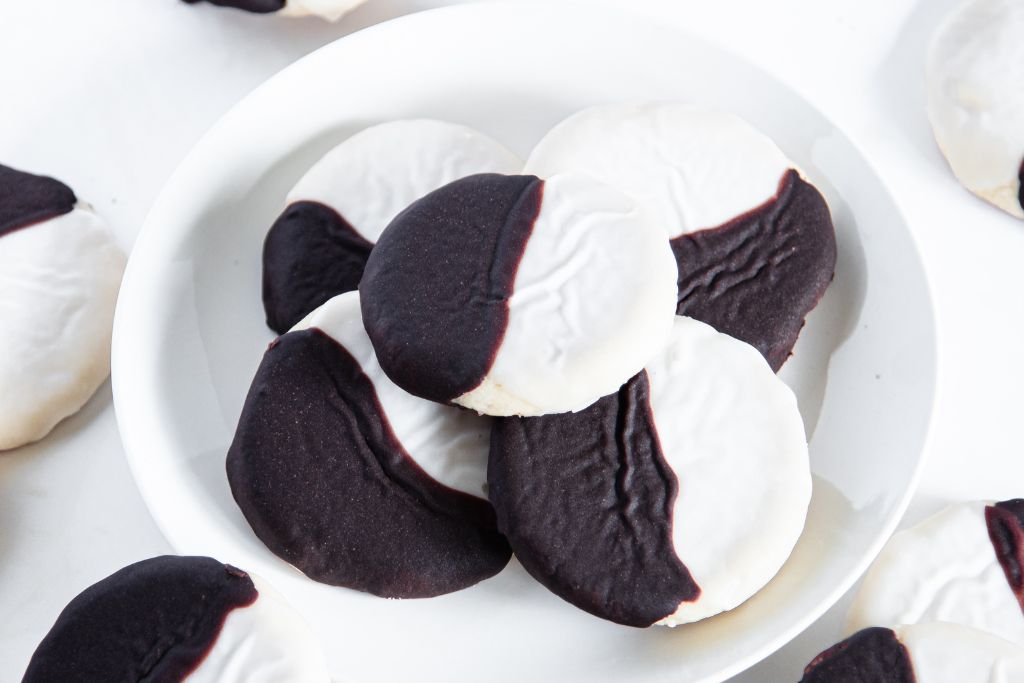
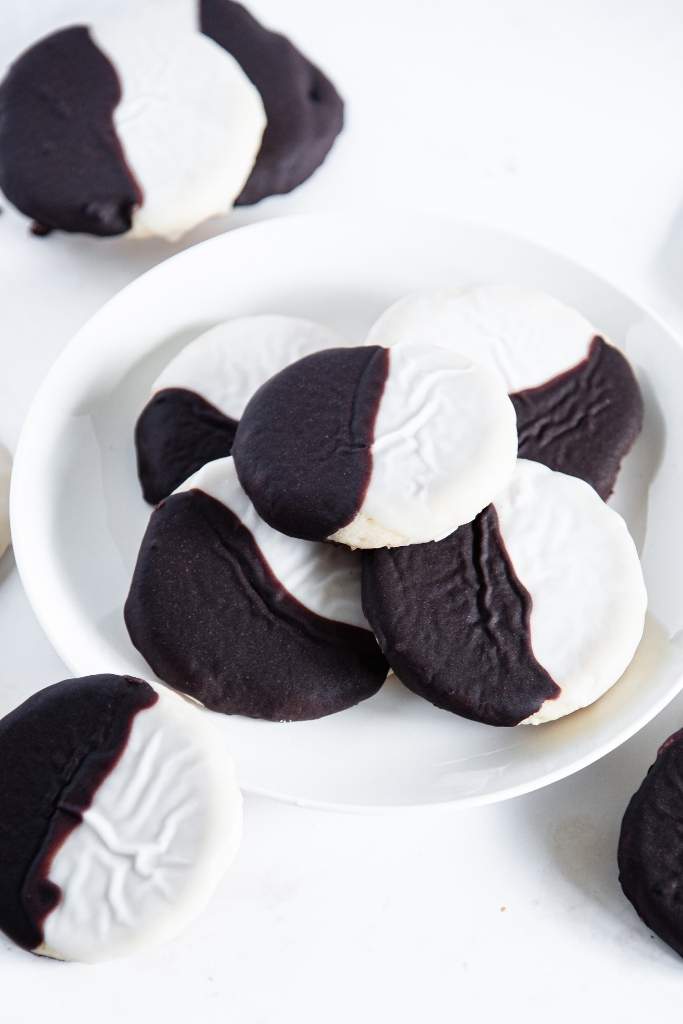
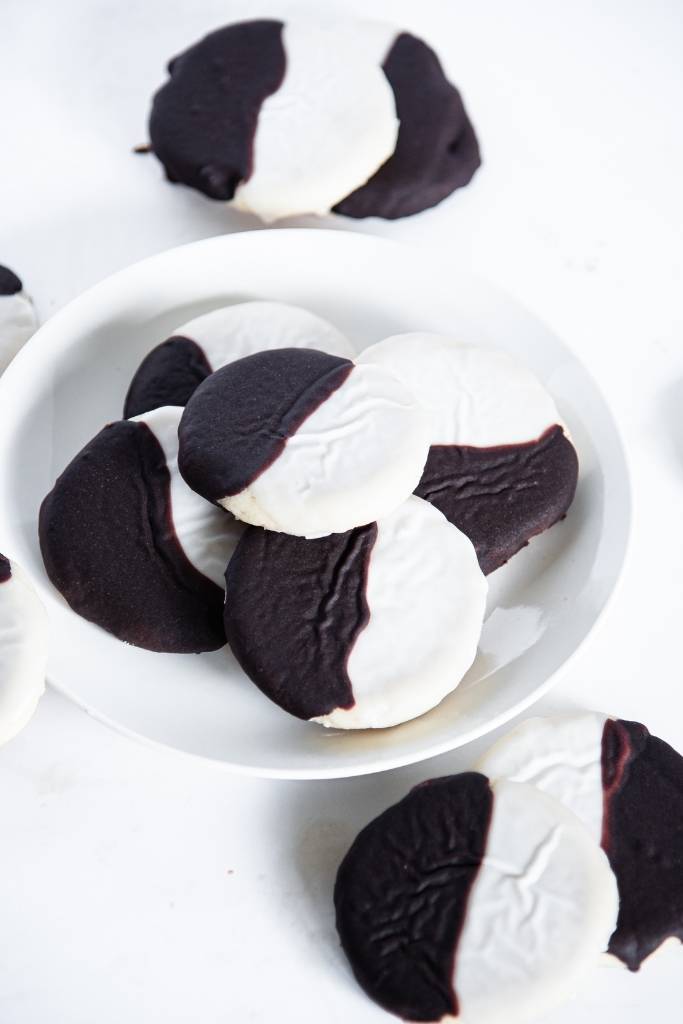
Decorating the Black and White Cookies
Using the back of a spoon, carefully spread a layer of white icing over half of each cookie. (Some people dip their cookies, but I find frosting them gives the best results.)
Allow the white icing to harden completely before adding the black icing.
Once the white side is dry, frost the remaining half with black icing—again, using the back of a spoon.
Let the black icing harden completely, then serve and enjoy!
Recipe Notes
Any leftover cookies can be stored in an airtight container at room temperature for up to 3 days.
The cookie dough is quite thick, so I highly recommend using an electric mixer, or even better, a stand mixer with a paddle attachment. It’s a lot easier than trying to mix them by hand!
This recipe typically makes about 18 cookies, but you can adjust the size to make smaller or larger cookies.
You may end up with extra icing. Feel free to halve the icing ingredients to reduce waste—but keep in mind you might need to make more later.
Traditional black and white cookies often include lemon extract or even fresh lemon zest or lemon juice. Personally, I wasn’t a fan of the lemon flavor in these cookies, so I opted to leave it out. But feel free to add some if that’s your thing!

Be Sure To Check Out These Great Cookie Recipes, Too!
Brown Butter Sourdough Discard Chocolate Chunk Cookies
Chocolate-dipped Shortbread Cookies with Candied Oranges
Black and White Cookie Recipe
Ingredients
For the Cookies
- 10 tbsp unsalted butter softened
- 1 cup white sugar
- 1 egg
- 2 tsp vanilla extract
- 1/3 cup sour cream
- 1/2 tsp baking powder
- 1/4 tsp baking soda
- 2 cups all-purpose flour
For the white icing:
- 2 cups powdered sugar
- 2-3 tbsp whole milk
- 1/2-1 tsp Clear vanilla extract optional
For the black icing (chocolate icing):
- 2 cups powdered sugar
- 2-3 tbsp whole milk
- 5 tbsp Black cocoa powder or Dutch-processed cocoa powder
Instructions
- Preheat the oven to 350°F. Line a large baking sheet with parchment paper and set aside.
- In a large bowl, beat together the softened butter and white sugar until fluffy. Add the egg, sour cream, and vanilla extract, and beat until well combined.
- Add the baking soda and baking powder, and mix. Finally, add the flour and beat until everything is fully incorporated. The dough will be very thick—don’t worry, that’s how it should be!
- Scoop the dough using a tablespoon and roll into balls. Place them on your prepared baking sheet, leaving a decent amount of space between each one (I usually bake 5–6 cookies per sheet). Gently flatten each ball of dough with your hand.
- Bake for 10–12 minutes, or until the bottoms and edges of the cookies are a light golden brown. Remove from the oven and gently flatten each cookie with the bottom of a glass or jar. (If your cookies already spread and flattened enough for your liking while baking, feel free to skip this step. I usually do it to make sure they’re all the same thickness.)
- At this point, I always like to reshape my cookies using a wide-mouth canning jar ring to make them nice and round, but feel free to skip this step.
- Allow the cookies to cool slightly on the baking sheet before transferring to a wire rack. Repeat with the remaining dough.
- Once the cookies are completely cooled, make the icings.
- In a small bowl, combine powdered sugar and whole milk for the white icing. Whisk until smooth. Add the clear vanilla extract, if using, and whisk again. Add more milk as needed to create a smooth, runny icing. Set aside.
- In a separate bowl, combine powdered sugar and whole milk for the black icing. Whisk until smooth. Add the cocoa powder and whisk to combine. Again, add more milk as needed to create a smooth, runny icing.
- Using the back of a spoon, carefully spread a layer of white icing over half of each cookie. (Some people dip their cookies, but I find frosting them gives the best results.)
- Allow the white icing to harden completely before adding the black icing.
- Once the white side is dry, frost the remaining half with black icing—again, using the back of a spoon.
- Let the black icing harden completely, then serve and enjoy!
Notes
Nutrition
Nutrition information is automatically calculated, so should only be used as an approximation.